The Button Jar
Since I was a child I loved my mother’s button jars, they were so exciting and in our house they were colour coded. There was the white jar which contained the shirt buttons, snipped from exhausted shirts worn to within an inch of their lives with turned collars and cuffs and strung together for re-use and then my favourites, the dainty Mother of Pearl buttons, that caught the light and sparkled. Then there was the bigger jar with huge coat and jacket buttons, in forbidding hues of navy, black and brown with horn buttons thrown in for light relief. And finally, my favourite the oddities, they were the bright shiny buttons, or the small delicate jobs shaped like flowers and I even seem to remember a few stray RAF buttons removed from my father’s Greatcoat.
Before my mother died she joked, “I’m not worried about making a will as I know that you two have got the contents of the house divvied up down to the button jars!”
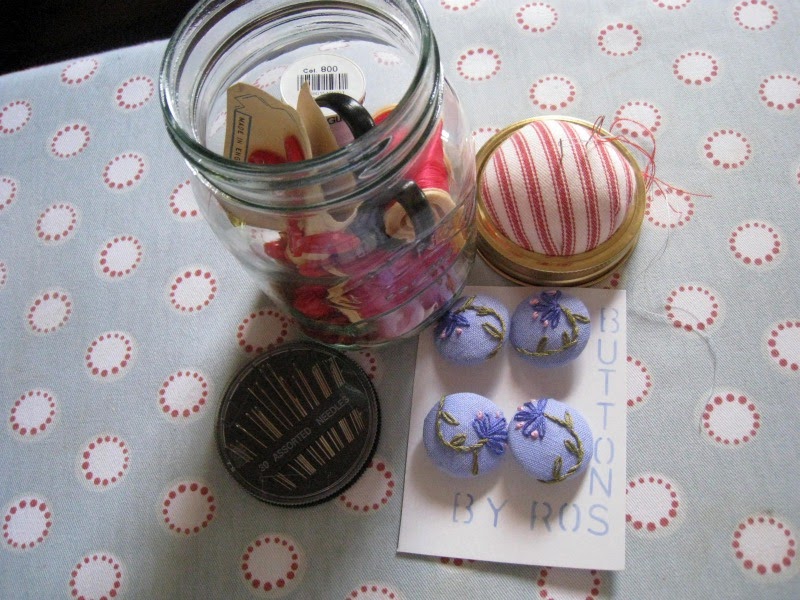
Kapok stuffing
A heavy drill cotton scrap – eg, Ticking
Cardboard
Glue gun (well now I have one I should practice with it!)
6 Self covering buttons
Contrasting fabric scrap
Iron on fabric paints – or
Embroidery threads
Pencil or fabric marking pen
 |
| The embroidery hoop you can see belonged to my mum and is over 70 years old |
Access to your kitchen for round items to draw around... or if you still have that set from Geometry or a Mason in the family, a pair of compasses
Embroidery hoop
Needle and scissors
Suggested contents to add to the jar
Small sharp pointy scissors
Set of sewing needles
White, Black Navy and Brown cotton
Hooks and Eyes
Take the jar apart and find in your kitchen a saucer, pint glass or large mug which is approximately 1" wider in radius than your metal disc lid. Use this as a template to draw out a circle on your ticking fabric and then use the metal disc to cut out a circle of cardboard and cut out another piece of fabric about half an in wider in circumference.


Let's say that your button is an inch wide, then draw a circle that is 1.5" in radius, draw six circles like this quite closely to each other and don't cut them out as we are going to stretch them over an embroidery hoop... I said DON'T cut them out, *tuts*


Cut out a square of cardboard and using a large sharp needle, sew a couple of stitches to attach the button to the card. If you have a compliant printer, print up some suitable wording to put on the card
So there you have it a day to day button jar with everything you need for a button emergency... and something for your children to fight over when you go!
And now for the really good stuff, pop over to Wendy's Homemade Monday and don't forget to leave a comment. Have a great week :)

