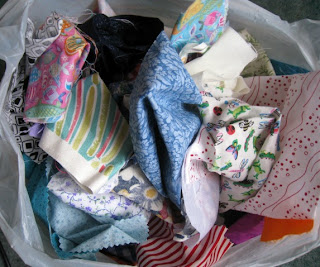
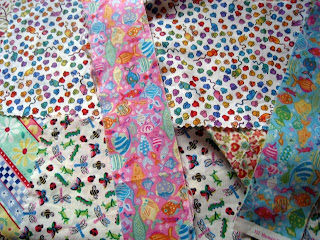
I don't know about you but I love little things, and I recently was looking at my scrap bag, alright I admit it, I was looking at just one of my scrap bags that I could see and realised that not even Poppy Treffry could use all of this in a month of Sundays.
So I sat looking at my sad living room and decided that what my shelves needed was some down and dirty mini-bunting to cheer them up.
You will need:
A bag of scraps, at least 2.5"in length... although 5" will be better
Rotary cutter, pinking wheel, cutting mat and ruler or pinking shears
Cotton
Pins
5/8" Bias binding - 54" long or bunting tape
Iron and ironing board
Tape Measure
We are going to cut triangles which are 2" across the base and 2.5" to the apex... but to make it even easier, take a piece of fabric which is 5" in length and fold it in half so it is now 2.5" long and press it.
Starting on your cutting mat with one end your ruler at zero, place the other end at a diagonal to 1", using the pinking blade cut across and then cut on the opposite diagonal down to the 2" mark, repeat the 2" triangles. We are making a yard of bunting, with 9" ties, we will be using 18 flags with 5/8" between them, so you need to decide whether you want multicoloured, or tastefully matched... Obviously I have gone with the tasteful version... Ahem *raises eyebrow*
Now here is where we get down and dirty :) As we have used a pinking wheel we are going to sew on the outside because the pinked edge means it will not fray, sew up the sides (with the reverse sides facing each other) but not the base using just 1/4" seam allowance, you might find it easier to keep the edge of your foot by the edge of your fabric as a guide.
Take your bias binding or tape and fold it in half, and press it firmly. Now tuck your mini flag in the fold of the bias binding and pin it into place, measure along 5/8" and pin in the next flag (the end of most tape measures is actually 5/8" so you could use that at a guide), continue to do this until you have used up your flags.
Then sew the tape together either using a straight stitch or using a contrasting thread with an embroidery stitch.
And there you have it... mid-week mini-bunting... I think I might even make some for Easter to complement my Easter Tree.
And I am afraid I am cheating a little this week, but I had rather a busy weekend, so this is also my submission for Handmade Monday (hangs head in shame)... but I promise to do better next week... honest!
And I am afraid I am cheating a little this week, but I had rather a busy weekend, so this is also my submission for Handmade Monday (hangs head in shame)... but I promise to do better next week... honest!


32 comments:
Very sweet and cheerful....great tutorial...thanks! :)x
Lovely idea - I have been looking at my scrap bag for inspiration too !
What a cute way to add a little cheer to a room!
That is so cute and cheery! I love making stuff before breakfast. Makes me feel like my day will be a great one.
very pretty and cheery.
It is hard when you have scraps and just dont know what to do with them
So cute and simple to make! Great idea :)
Ohh! What a good idea! Thank you x
This is ADORABLE! Love this idea!
I love bunting - it seems to translate as "happy and cheerful" and the mini-bunting is a great idea.
I like the pinked edges. They are pretty and they save a lot of sewing!
so cute, I have red mini bunting on my bookshelves and try to change it to reflect the seasons (I am still on valentines at the moment!)
I love mini bunting and made some for Christmas to hang around the house, you can never have enough bunting! Amanda x
This is great - much better than full-size bunting. Thanks for sharing!
Jo x
Lovely Spring bunting Ros
That bunting looks great - it really brightens up the shelf. Makes me wish I could sew... :)
so cute! Now I really need to go and buy a cutter.
So pretty and an ideal way to use up all those scraps, that can just not be thrown away as you never know.
It looks gorgeous and makes a brilliant little tutorial (I think a lot of people like mini projects as you feel you've achieved something quite quickly). It's a superb way to bring a bit of spring/summer cheer to any corner! Excellent way to use scraps, too.
What a lovely way to use up small pieces of material - looks very cheerful and summery. Many thanks for another great tutorial. Hope you have a good week.
How cute is that bunting. Looks great in the multi colour - I think you chose well!
Alison
Blue Forest Jewellery
Thanks for the tutorial, now I have an excuse for keeping all those scraps of material.
That's really pretty, And I think might have solved a problem. I've long bemoaned the fact you can't get left handed pinking shears, but I don't suppose left handedness is so much of a problem with a wheel, Hooray! I'm about to make yards of bunting for a wedding!
Thank you x
I feel the need for a cutting wheel. The bunting is really sweet and colourful. It looks great on the shelf with your spring daffs. Lovely.
Jan x
I didn't know you could get a blade for the rotary cutter that did a zigzag edge, thats really cool. A definite 'must have'
A fun way to use up scraps and I think perfect for Easter. Thank you for your comment on my blog. Chester was introduced to a gorgeous little 3 year old the other day. She loved him, and looked so tiny next to him :)
Great tutorial and great idea, mini projects are ideal for people like me who don't have the patience to see many big projects through til the end. x
A lovely tutorial - and just the thing to use up scraps (I'm going to get one of those round cutter things) Mich :)
Awww I love that mini bunting! It's so cute and gorgeous! I have the perfect place to hang it... must go and make!
Thank you for the mention on your blog and the lovely comments, it was so kind of you and meant so much.
*MASSIVE HUGS*
LH
x
just found your blog and then realised we live close together, do you go to any craft fairs? I would love to know where they are if you do, the buntin is lovely. I started some mini bunting ages ago but never seems to get around to finishing :)
Cate
Love it! ♥
Greetz , Ivonne
My last comment didn't leave my blog name for some reason
cate
These are adorable. I love bunting and I will try this.
Love the mini bunting may have to try some for my daughter I have made larger conventional bunting which I featured on my blog. This is so pretty
http://dawntheconstantcrafter.blogspot.com/
Post a Comment